Plastex Review in Corvette Fever.
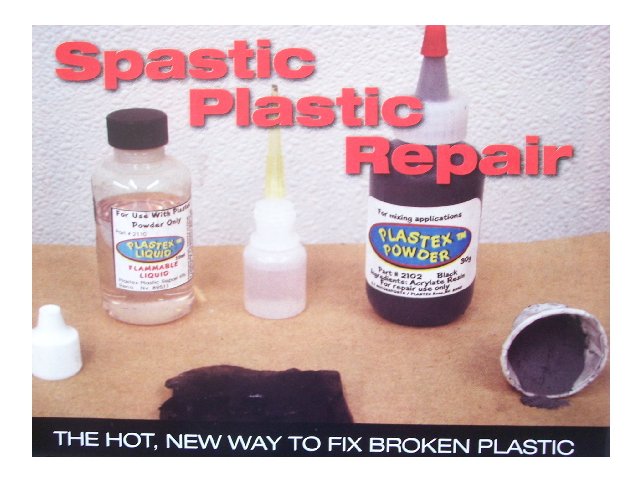
Spastic Plastic Repair

The hot, new way to fix broken plastic.
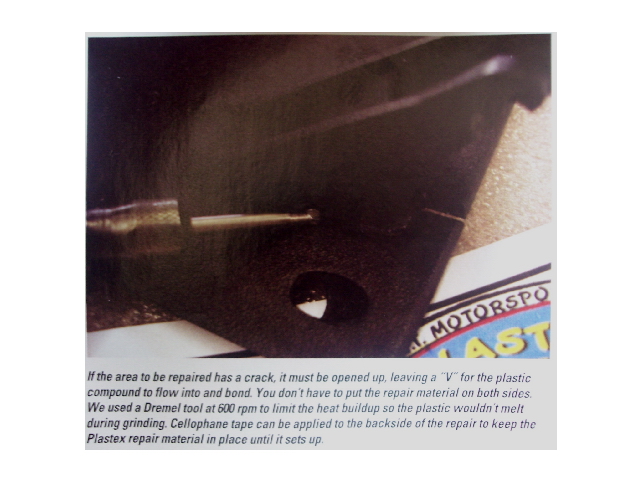
If the area to be repaired has a crack, it must be opened up, leaving a "V" for the plastic compound to flow into the bond. You don't have to put the repair material on both sides. We used a Dremel tool at 500 rpm to limit the heat buildup so the plastic wouldn't melt during grinding. Cellophane tape can be applied to the backside of the repair to keep the Plastex repair material in place until it sets up.
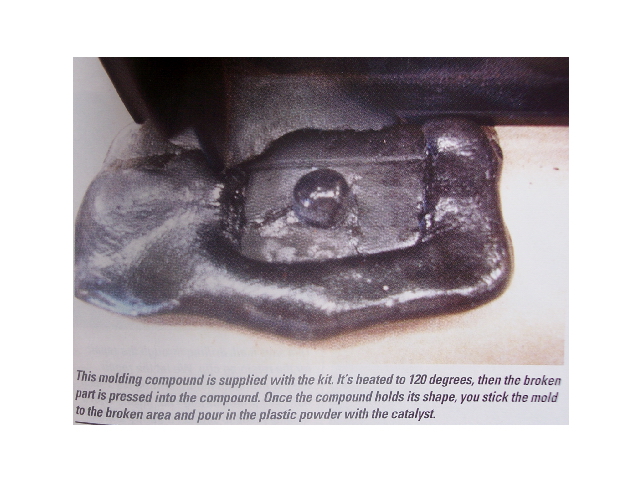
The molding compound is supplied with the kit. It's heated to 120 degrees, then the broken part is pressed into the compound. Once the compound holds its shape, you stick the mold to the broken area and pour in the plastic powder with the catalyst.
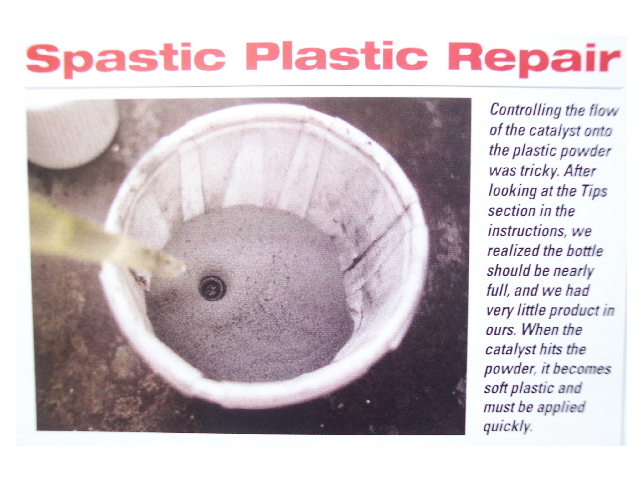
 Controlling the flow of the catalyst onto the plastic powder was tricky. After looking at the Tips section in the instructions, we realized the bottle should be nearly full, and we had very little product in ours. When the catalyst hits the powder, it becomes soft and must be applied quickly.
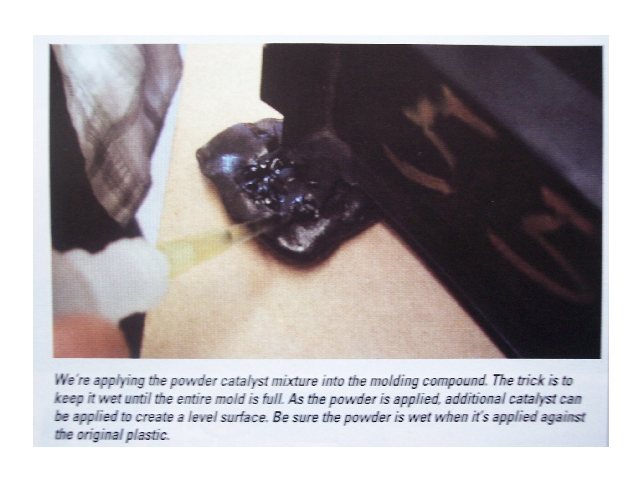
We're applying the powder catalyst mixture into the molding compound. The trick is to keep it wet until the entire mold is full. As the powder is applied, additional catalyst can be applied to create a level surface. Be sure the powder is wet when it's applied against the original plastic.
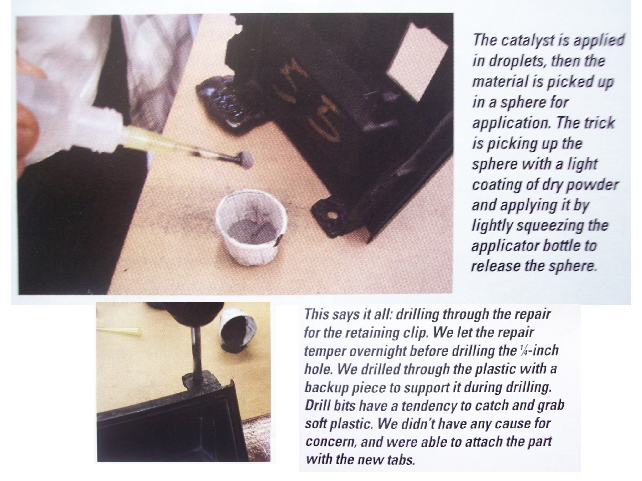
The catalyst is applied in droplets, then the material is picked up in a sphere for application. The trick is picking up the sphere with a light coating of dry powder and applying it by lightly squeezing the applicator bottle to release the sphere.
This says it all: drilling through the repair for the retaining clip. We let the repair temper overnight before drilling the 1/4 inch hole. We drilled through the plastic with a backup piece to support it during drilling. Drill bits have a tendency to catch and grab soft plastic. We didn't have any cause for concern, and were able to attach the part with new tabs.
Over the years, we've done quite a few interior restorations with pleasing results. Then along comes C4 Corvette with a new set of problems to deal with. Sure, while the '77 and later sharks started using more plastic than ever before, the C3 plastic material seemed tougher than the C4 interior pieces. Since the flat-dash C4's are approaching their 20th birthdays, many of their interior's need help.
With all the C4s being cut up for Vette rod suspensions, you'd think a lot of decent plastic interior pieces would be available. The problem is, almost all of the interior panels are cracked and broken. We've dismantled our share of early C4s for Vette Rods, and no matter how nice the car is. A good example is the sill-panel cover on the '84-'89 cars, especially on the driver side. How many of these do you see in good shape? Not many.
We've tried Super Glue and model cement to stick plastic pieces back together to no avail. Then, a few years ago, a mobile tool supply van rolled in with a plastic welding kit, which we decided to try. We pulled out the directions and were immediately intimidated by the product. While the welding would be relatively easy, the brainteaser was determining which plastic we were working with.
Unfortunately, there are many plastic compounds; some melt and bond together and some just burn. In the instructions were questions such as: Does it smoke or bubble when heat is applied? Included were eight different sticks of plastic compounds to determine what works best. (We eventually discovered that the plastic welding kit worked perfectly modifications on Optispark distributor caps.)
Another problem was, if the repair was visible inside the car, it was usually hideous. We discovered that both sides of the crack required welding for durable repairs. Subtle tricks might work, including heating the weld spot, then applying vinyl to re-create the grain. Unfortunately, applying hear improperly can make a small concern become a heartbreaker.
While at SEMA last year, we found a plastic repair kit like no other. Tim, form G.T. Motorsports, was repairing broken plastic housings and re-creating broken of tabs with ease using Plastex. We were intrigued because it appeared he was making plastic right in front of us. Within a few minutes, we were making plastic tabs ourselves.
As Tim explained, the substance is made of tiny plastic beads and a catalyst. The pieces we repaired were stronger than the surrounding plastic. The Plastex repair kits come in clear, black, and white. If you need another color, coloring agents are available. Since Plastex is a true plastic, you don't need to know the type you're repairing. The same procedure applies to all plastics.
The beads are in a powder form and, when the catalyst is applied, it reacts to create plastic bond to the surrounding material. When the catalyst is first is first applied, the mixture feels like soft plastic that's been heated. After the reaction takes place and the repaired piece cools (the chemical reaction causes heat), the Plastex us as hard as the surrounding plastic.
We put one of the kits to the test. The instructions are simple, but your first repair should be on something disposable. To our surprise, the repair kit worked at the shop just like it did at the show.
Using the catalyst and powder takes some finesse, but once you get the hang of it, the sky's the limit. Give the repair some time to set up, and don't be in a hurry to put the part back in use. The repaired piece becomes hard when it has finished its chemical reaction, which usually occurs in 15 minutes.
We tested the Plastex kit on a glovebox door that was broken at the plastic hinge, and so far it's held up to heavy abuse (for testing). If you want to permanently repair the plastic parts in your Corvette, Plastex is the fix. The kits are reasonably priced at $9.95 for small repairs and 24.95 for large. Shop kits for major repairs are also available.
